Tutorial (Second Stage, Steps 16 - 30) - Film Artwork Design
<<< Previous Steps (Stage B, Steps 1-15)
-
Make sure the Film Strip layer is selected on the layers panel, next click on Effects -> Deformations -> Flag menu and set the values as shown on figure no. 20, next click OK to apply the effect (figure no.21)
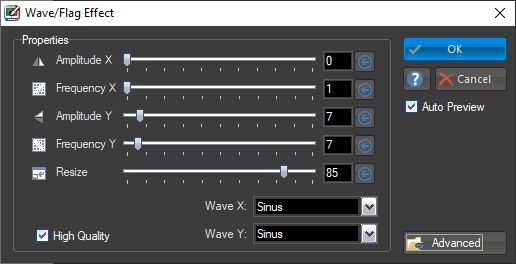
figure no.20
-
Click on the film strip to select it (figure no.21), next use the red "knob" of the interface to apply some rotation to it (figure no.22)
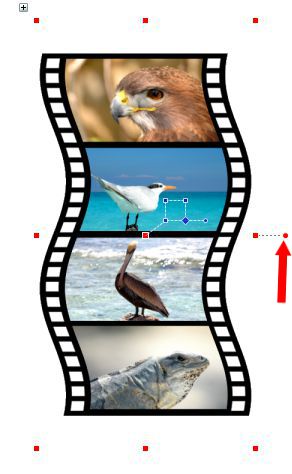
figure no.21
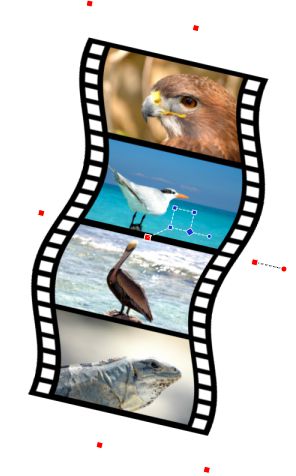
figure no.22
-
Click on the (vectorial) effects tab founds on the right panel of the software (below the layers panel), check the Perspective effect option (figure 23-1), next click on the "..." button to open the Perspective tab of the vectorial effects dialog (figure 23-2)
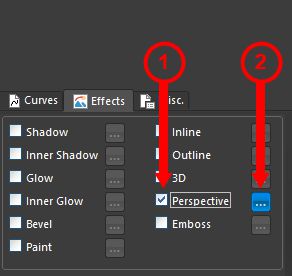
figure no.23
-
On the Perspective tab of the vectorial effects dialog fill in the values shown on figure 24 and click OK to apply the effect and get the result shown on figure no.25
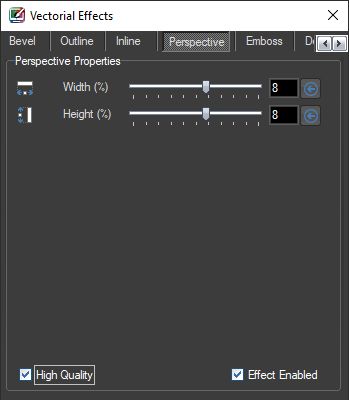
figure no.24
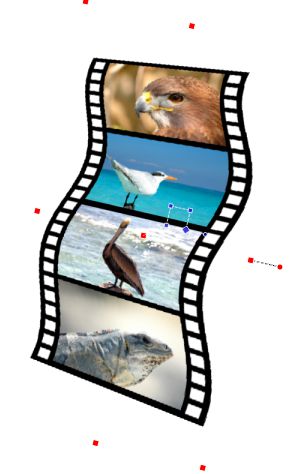
figure no.25
-
Now we will add a shadow effect - check the Shadow effect option on the effects tab (figure 26-1), next click on the "..." button to open the Shadow tab of the vectorial effects dialog (figure 26-2)
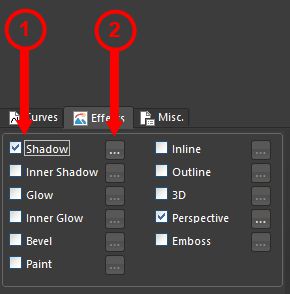
figure no.26
-
On the Shadow tab of the vectorial effects dialog fill in the values shown on figure 27 and click OK to apply the effect and get the result shown on figure no.28
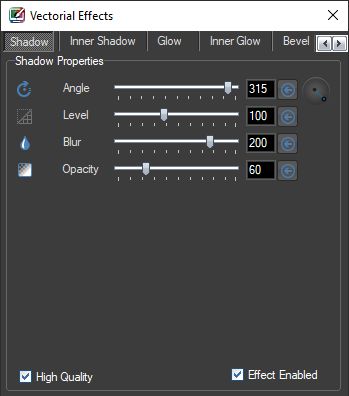
figure no.27
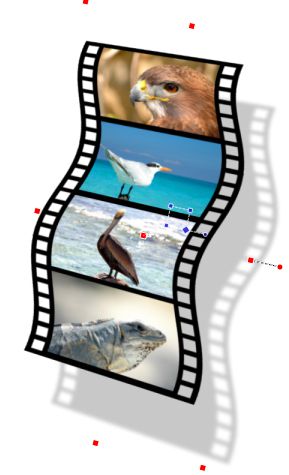
figure no.28
-
Next use the move/resize/rotate to (figure no.29) stretch the film strip and make it more higher and less wider and center it in the middle of the image. Once finish click Esc key to deselect the strip and get the final result as shown on figure no.30
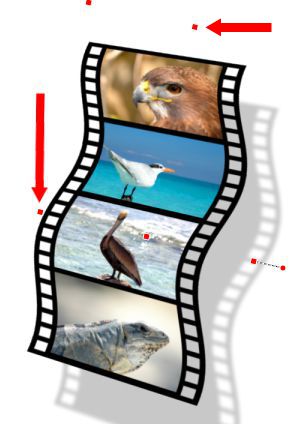
figure no.29

figure no.30
|