Tutorial (Part B) - Neon Sign Effect
<<< Previous Steps (Steps 1-10 / Part A)
-
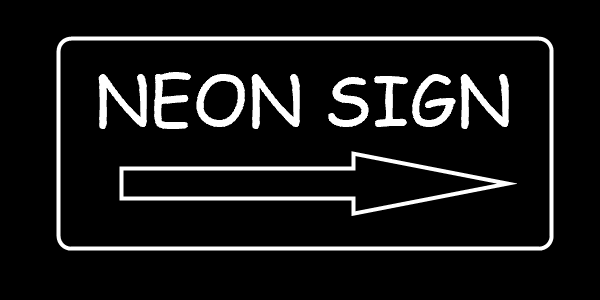
After selecting the desires location, type in the desired text. To get a good effect choose big font size (size 50 - 60, we used "Comic Sans MS" size 52 font, figure no.7).

figure no.7
-
Use the mouse to draw a piece of arrow shape ,move & resize the text to the desired location (figure no.8)

figure no.8
-
Click on ESC key or on Layers & Objects -> Deselect All Layers & Objects menu, to deselect and fixed the text to it's place
-
At this stage you should have image with four layers - a background layer, rounded rectangle shape layer, arrow shape layer and a text layer.
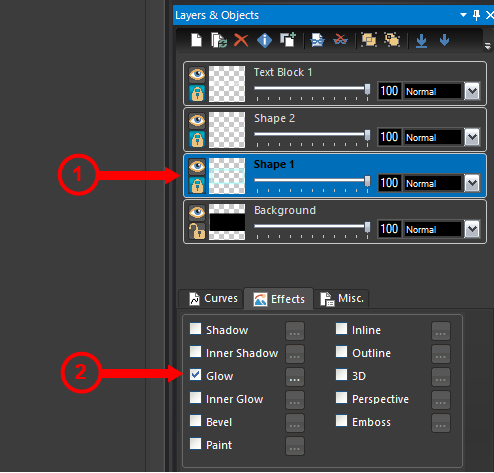
Select the rounded rectangle shape layer (figure no.9 - 1), on the effect tab check in the Glow effect and click on the "..." button near to it to open the Glow tab of the vectorial effects dialog (figure 9-2)

figure no.9
-
On the Glow tab of the vectorial effects dialog fill in the values shown on figure no.10 and click OK to apply

figure no.10
-
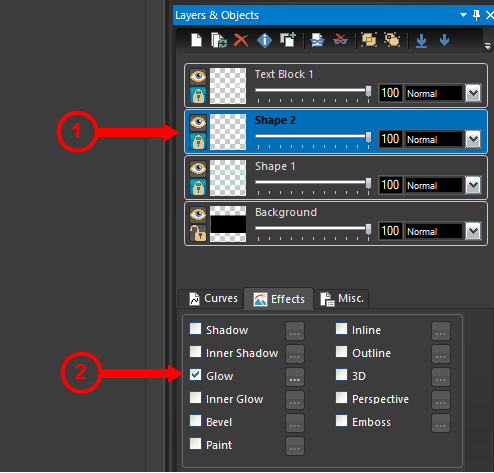
Select the arrow shape layer (figure no.11 - 1), on the effect tab check in the Glow effect and click on the "..." button near to it to open the Glow tab of the vectorial effects dialog (figure 11-2)

figure no.11
-
On the Glow tab of the vectorial effects dialog fill in the values shown on figure no.12 and click OK to apply

figure no.12
-
Select the text layer (figure no.13 - 1), on the effect tab check in the Glow effect and click on the "..." button near to it to open the Glow tab of the vectorial effects dialog (figure 13-2)

figure no.13
-
On the Glow tab of the vectorial effects dialog fill in the values shown on figure no.14 and click OK to apply

figure no.14
-
Finally you should get a nice neon sign effect (figure no.15)

figure no.15
|