Photo Pos Pro free photo editor - Online Help

Custom Search


Help to Photo Pos Pro froever Free!
Even $1 donation can greatly help!

Step By Step Tutorials | How to... (Quick guide for common tasks) | Support & Info Page


Colors Menu

Under this menu are found many functions which are used to manage the color and brightness of an image. Through the functions in this menu it is possible to fix, improve and change the colors of an image and its hues, to repair dark and shadowy pictures, fix unclear pictures, create special effects and much more.

Auto Corrections

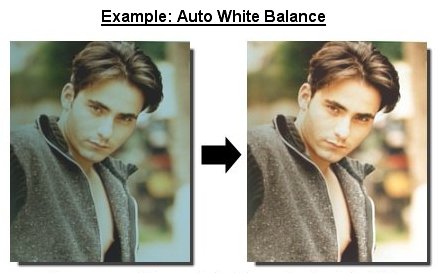
This sub-menu has a number of automatic functions for the quick repair of imperfect pictures. Through these functions you will be able to improve these pictures a great deal.


How to... - Fix poor photos


  Brightness/Contrast

This function is used to change the brightness and/or contrast of an image.
  • Brightness Slider - With this command you can control the level of brightness in the image. Moving the regulator to the right will increase the brightness while moving it to the left will decrease it.
  • Contrast Slider - With this command you can control the level of contrast in the image. Moving the regulator to the right will increase the contrast while moving it to the left will decrease it.


RGB (Red/Green/Blue)

This function is used to change the degree in the levels of the color channels (RGB) Red, Green, Blue in an image in percents. In effect, the function controls the degree of Contrast in a channel.
  • Red Slider - With this command you can control the degree of (the) levels in the Red channel. Moving the regulator to the right will increase its levels (in percentage) while moving it to the left will lower its levels (in percentage).
  • Green Slider - With this command you can control the degree of (the) levels in the Green channel. Moving the regulator to the right will increase its levels (in percentage) while moving it to the left will lower its levels (in percentage).
  • Blue Slider - With this command you can control the degree of (the) levels in the Blue channel. Moving the regulator to the right will increase its levels (in percentage) while moving it to the left will lower its levels (in percentage).


RGB Absolute (Red/Green/Blue)

This function is used to change the degree in the levels of color channels RGB (Red, Green, Blue) in an image with an absolute value (the selected value is added/subtracted from the channel). In effect, the function controls the degree of Brightness in the channel.
  • Red Slider - With this command you can control the degree in the levels of the Red channel. Moving the regulator to the right will increase its level (by an absolute value) while moving the regulator to the left will lower the level (by an absolute value).
  • Green Slider - With this command you can control the degree in the levels of the Green channel. Moving the regulator to the right will increase its level (by an absolute value) while moving the regulator to the left will lower the level (by an absolute value).
  • Blue Slider - With this command you can control the degree in the levels of the Blue channel. Moving the regulator to the right will increase its level (by an absolute value) while moving the regulator to the left will lower the level (by an absolute value).


  HSL (Hue/Saturation/Luminosity)

This function is used to change the degree in the levels of the HSL (Hue/Saturation/Luminosity) in an image. Adjusting the HSL channels in an image resembles adjusting the image in a television set.
  • Hue Slider - With this command you can control the hues of an image. Moving the regulator to the right/left will change the hues of the image.
  • Saturation Slider - With this command you can control the quantity of color in an image (similar to adjusting the color in a television set). Moving the regulator to the right will increase the quantity of color in an image while moving it to the left will decrease the color in an image. Moving the regulator to the far left will entirely remove color from the image and the result will be a Gray-Scale image.
  • Luminosity Slider - With this command you can control the quantity of light in a picture. Moving the regulator to the right will make it more luminous while moving it to the left will make it darker.


HSV (Hue/Saturation/Value)

This function is used to change the degree in the levels of the HSV (Hue/Saturation/Value) in an image. Adjusting the HSV channels in an image resembles adjusting the image in a television set.
  • Hue Slider - With this command you can control the hues of an image. Moving the regulator to the right/left will change the hues of the image.
  • Saturation Slider - With this command you can control the quantity of color in an image (similar to adjusting the color in a television set). Moving the regulator to the right will increase the quantity of color in an image while moving it to the left will decrease the color in an image. Moving the regulator to the far left will entirely remove color from the image and the result will be a Gray-Scale image.
  • Value Slider - With this command you can control the quantity of light in a picture. Moving the regulator to the right will make it more luminous while moving it to the left will make it darker.


Logarthim Stretch

This function is used to logarithmically stretch an image. A logarithm stretch is used to repair pictures that were taken under bad lighting conditions. With this stretch it is possible to retrieve details from pictures.
  • Log Factor Slider - With this command you can control the factor of the Log function. Altering the regulator will cause a logarithmic change in contrast of an image.
  • Stretch Slider - With this command you can control the Log function's value. Moving the regulator will change the Log curve which is used to calculate the Contrast.


Exponential Stretch

This function is used to perform the exponential stretch on an image. An exponential stretch is used to achieve the effect of contrast in different areas of the picture.
  • Exp Factor Slider - With this command you can control the factor of the Exponent function. Altering the regulator will cause an exponential change in contrast in the image.
  • Stretch Slider- With this command you can control the value of the Exponent function. Altering the regulator will change the Exponent curve which is used to calculate the Contrast.


Gamma Correction

This function is used to perform the Gamma correction operation on an image. A Gamma correction is a correction that compensates for distortions caused to pictures that have either been scanned to the computer or photographed with a digital camera and also for distortions to the pictures that have been caused by the computer's monitor. The function's correction graph appears on the right side of the function's window (panel).
  • Red Slider - With this command you can control the degree of the Gamma correction to the Red channel. By altering the regulator you can adjust the degree of correction until you reach the desired result.
  • Green Slider - With this command you can control the degree of the Gamma correction to the Green channel. By altering the regulator you can adjust the degree of correction until you reach the desired result.
  • Blue Slider - With this command you can control the degree of the Gamma correction to the Blue channel. By altering the regulator you can adjust the degree of correction until you reach the desired result.
  • Link Checkbox - By marking this checkbox you can cause all three of the regulators Red, Green and Blue to move in unison and that way perform identical Gamma correction simultaneously to all three color channels (default).


  GrayScale (Black & White Photograph)

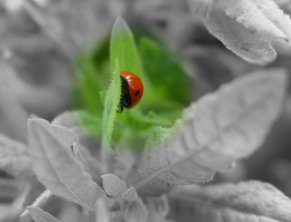
This function is used to convert a color picture into a gray-scale picture with 256 shades of gray, which is similar to a black and white photograph.


How To... - Convert colorful image to black and white while leaving part of it in colors


  Negative

This function creates a negative of the original picture, which is similar to the negative of a photograph.


Channels

This sub-menu has a number of functions which are associated with separating and combining color channels in an image.
  • Split To RGB -
  • This function splits a color picture into three color channels (RGB). The function creates a new picture for each color channel. This function does not affect the original image.
  • Combine From RGB - This function combines three color channels from three different pictures, creating a new color picture. This function does not affect the original pictures.
    • Red Dropdown Box - This box is used to select the picture from which the Red channel will be taken.
    • Green Dropdown Box - This box is used to select the picture from which the Green channel will be taken.
    • Blue Dropdown Box - This box is used to select the picture from which the Blue channel will be taken.


Color Depth

This sub-menu has a number of functions which are associated with the quantity of color in an image.
  • Convert to B/W (Dithering Order) - This function is used to convert a color image into a B/W image with two shades (black and white) similar to an image created in print in black and white.
  • Convert to B/W (Auto Threshold) - This function is used to convert a color image into a B/W image with two shades (black and white) similar to a collage in black and white. The threshold value is determined automatically by the average color value in the image.
  • Convert to B/W (Custom Threshold) - As above, the threshold value is determined by the user.
    • TH Value Slider - With this command you can control the threshold value used to convert the image to black and white. Moving the regulator to the right will increase the threshold value while moving it to the left will decrease it.
  • Convert to Custom Number of Colors - This function is used to change the quantity of color in an image according to the user's definition.
    • Number of Colors Slider - With this command you can control the quantity of colors in an image. Moving the regulator to the right will increase the quantity of colors in an image while moving it to the left will decrease it.


Curves

The Curves function is a very important function used to define new functions in areas of color, brightness and saturation of the image. With the Curves panel you can define new functions that do not exist in the program and by doing so-broaden the capacity of the program yourselves! Every new function that you will create will be made up of 6 curves: the brightness curve, shade curve (the color), saturation curve (quantity of color in the picture), red channel curve, green channel curve and the blue channel curve. In every curve, the horizontal axis (X) marks the degree of entry (input) of the channel and the vertical axis (Y) marks the degree of departure (output) of the channel.


Replace

This function is used to change shades (and exchange colors) in different areas in an image where a change of shade is needed, without affecting the other areas of the image (the areas that do not need a change of shade). In order to choose the original shade (the shade that will be replaced by the function) use the mouse to click on the desired point in one of the pictures from the preview pictures (located at the top of the function window). The default is the background shade.
  • New Color Tab - The commands on this column define the value of the new color (the color that will replace the original color). The color is defined by the following
    • Hue Slider - With this command it is possible to set the value of the Hue channel in a new shade.
    • Sat (Saturation) Slider - With this command it is possible to set the value of the Saturation channel in a new shade.
    • Lum (Luminosity) Slider - With this command it is possible to set the value of the Luminosity channel in a new shade.
  • Advanced Tab - The commands on this column control the advanced features of the function.
    • Source Range Dropdown Box - With this command it is possible to specify the manner of selection of the area where the shade will be replaced. The Hue option will select the areas only according to the Hue channel while the combined option of Hue and RGB will select the areas according to the Hue, Red, Green and Blue channels.
    • New Color Dropdown Box - With this command it is possible to specify the manner of setting the new shade (the designated shade). The HSL (%) option will change the designated shade in percents while the HSL (+) option will change the designated shade by adding the command values Hue, Sat and Lum.
  • Replacement Range - The commands in this frame define the scope of the area where the shade will be replaced.
    • Tolerance Control - This command defines the area where the shade will be replaced by setting the range of deviation of the original color that you wish to be replaced. The shade will be replaced in all the points that are found in this range.
    • Edges Control - This command defines the way the designated color combines with the original color. The value of 0 will cause an equally unified exchange of color in all areas defined by the Tolerance. In values greater than 0, the original color will be completely exchanged by the new color while the nearby colors (those defined by Tolerance) will blend with the original color according to their value (which allows for smooth transition between the color areas).


PhotoPos.com Home Page | Help Home | 1999 - 2013 (c) Copyright Power Of Software. All rights reserved