Photo Pos Pro free photo editor - Online Help

Custom Search


Help to Photo Pos Pro froever Free!
Even $1 donation can greatly help!

Step By Step Tutorials | How to... (Quick guide for common tasks) | Support & Info Page


Selections

In many cases, there is a need to perform operations only on certain parts of an image. In fact, this is one of the most common tasks in the digital processing (editing) of an image. The possibility to perform operations only on certain parts of the images enables you to perform accurate editing operations only on those areas needed without having to change the rest of the image. The program contains many tools and functions that enable the selection of an area on the image. An area selected is called a Selection. The selected area is represented by a broken line called Marquee. The part within the selection is called the Selection Area. After the selection operation, it is possible to edit the selection area, copy it, cut it, delete it, move (drag) it to another location, and many other operations. Controlling the selection tools and the selection functions is very important and essential to successful editing works (tasks, operations, etc.).

Selecting an area on an image

In order to select an area on an image you may use one of three tools: Standard Selection, Custom Selection & Magic Wand. Additional functions related to selection are found under the Selections menu.

The Selection Tools

The software's toolbox contains 3 main selection tools: the Standard (Geometric) Selection Tool, the Custom Selection Tool (which also combines a powerful tool called Magic Selection) and the Magic Wand. With the selection tools it is possible to perform various operations, from simple tasks of selecting areas to more complex tasks such as selecting complex areas, separating an image from a background and more.

Standard (Geometric) Selection Tool

With this tool is possible to select areas on a picture with geometric shapes like squares, rectangles, circles, ellipsis, arrows, stars, hearts and much more, or a combination of the above.

  • Type Toolbar - With this toolbar it is possible to select the geometric form of the selection .
  • Feather - The Feather's value defines how the edges of the object/selected area will look. The lower the value of the Feather is, the sharper will the edges of the object/selected area be. The higher the value of the Feather is, the smoother and "softer" will the edges of the object/selected area be (will cause the edges to gradually integrate with the background).When the Feather's value is greater than 0 (i.e. when there is Feather), it is possible to select one of two types of Feather: Round edges or Sharp edges. The selection of the Feather type is done with the radio dial or the Sharp button (depending on which tool you are using), located near the Feather Box.
  • Smooth (Antialias) - Marking this box will create a object/ selection area with smooth edges (which will blend smoother with the surrounding background). The smoothing is created by adding semi-transparent pixels to the edge area of the image and in so creating a smoother transition and integration between the object/selected area and the background.
How to use the tool

In order to (actively) select an area on the picture, use the mouse to point on the spot where you wish the selection to begin. Click on it with the mouse's left button. While keeping the button pressed, drag the mouse until you reach the desired shape. To finish the operation, release the mouse's left button. The selection created will appear on the screen.

Custom Selection Tool

With this tool it is possible to select areas on the picture in any shape whatsoever. The selection of the areas can be done in one of two forms: Polygon or Free (or a combination of the two). In addition, any one of the selection types can include within it the Magic Selection, which facilitates the selection of desired areas on a picture (details ahead).

  • Type Dropdown Box - Within this box it is possible to select the type of selection: Free, for the free selection of areas by drawing the circumference line of the area selected with the mouse; and Polygon, for selecting areas with an angle shape by using the mouse to draw the area's angles (from point to point).
  • Feather - The Feather's value defines how the edges of the object/selected area will look. The lower the value of the Feather is, the sharper will the edges of the object/selected area be. The higher the value of the Feather is, the smoother and "softer" will the edges of the object/selected area be (will cause the edges to gradually integrate with the background).When the Feather's value is greater than 0 (i.e. when there is Feather), it is possible to select one of two types of Feather: Round edges or Sharp edges. The selection of the Feather type is done with the radio dial or the Sharp button (depending on which tool you are using), located near the Feather Box.
  • Smooth (Antialias) - Marking this box will create a object/ selection area with smooth edges (which will blend smoother with the surrounding background). The smoothing is created by adding semi-transparent pixels to the edge area of the image and in so creating a smoother transition and integration between the object/selected area and the background.
  • Magic Selection Check Box - When this box is marked while performing a selection (Free or Polygon), the selection's lines will fix themselves automatically on the borderlines (line edges) (the borderlines/"edges" of the image - the areas in which there is a sharp transition of brightness) in the area of the defined window in the Window Box. This option is very useful when you want to mark/work with an image located on a background (when you want to perform an operation only on the image or when you want to separate the image from the background). With this element it is possible to perform the task easily since the selection lines will know to automatically attach/adjust themselves to the outline of the image without troubling the user with precision or effort on his/her part.
  • Tolerance - With this regulator it is possible to define the size of the area where the Magic Selection operation will be performed. This regulator is available only when the Magic Selection is activated.
  • Smooth Level - With this regulator it is possible to define the level of smooth of the Magic Selection tool. This regulator is available only when the Magic Selection is activated.
How to use the tool

The Free Selection: In order to (actively) select an area on the picture, use the mouse to point on the spot where you wish the selection to begin. Click on it with the mouse's left button. While keeping the button pressed, drag the mouse until you reach the desired shape. To finish the operation, release the mouse's left button. The selection created will appear on the screen.
The Polygon Selection: In order to (actively) select the area on the picture, use the mouse to point on the spot where you wish to begin the selection and left-click with the mouse. Each new left-click on the mouse while pointing on a different area on the picture will create a rib. In order to finish the selection (and close the polygon), either right-click with the mouse on the picture or left-click anywhere else outside of the picture or double click on the picture.

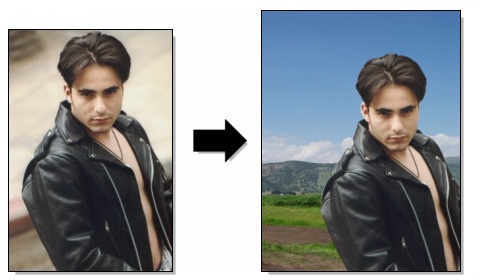
Tutorial - Take out/in someone from a photo (or replacing an image background) using the magic selection feature


Magic Wand (Selection) Tool

The Magic Wand tool enables the selection of areas in a picture which have similar levels of brightness/hue. (For example, when there is an image on a background with the same hue, it is possible to select the background easily with the Magic Wand. After selecting the background, it is possible to perform the invert operation on the selection and by doing so, in effect, selecting the image).

  • Type card-index
    Using the commands in this card-index, it is possible to define the tool's characteristics.
    • Match Mode Dropdown Box - With this box it is possible to select the way in which the hues are matched, on which the selection operation is based.
    • Tolerance Slider - With this regulator it is possible to decide the scope of the hues which will be selected (in relation to the original hue selected from the picture). The higher the value of the Tolerance is, the scope of the hues selected will be larger and so the area of selection will increase as a result. The lower the value is, the smaller the scope of the hues will be and the closer it will be to the original hue and so, the area which will be selected will be smaller.
    • Smooth (Antialias) - Marking this box will create a object/ selection area with smooth edges (which will blend smoother with the surrounding background). The smoothing is created by adding semi-transparent pixels to the edge area of the image and in so creating a smoother transition and integration between the object/selected area and the background.
  • Advanced card-index
    With the commands in this card-index it is possible to define a number of advanced characteristics of the tool.
    • Feather - The Feather's value defines how the edges of the object/selected area will look. The lower the value of the Feather is, the sharper will the edges of the object/selected area be. The higher the value of the Feather is, the smoother and "softer" will the edges of the object/selected area be (will cause the edges to gradually integrate with the background).When the Feather's value is greater than 0 (i.e. when there is Feather), it is possible to select one of two types of Feather: Round edges or Sharp edges. The selection of the Feather type is done with the radio dial or the Sharp button (depending on which tool you are using), located near the Feather Box.
    • Select Area By - Defines what the selection will be based on: the active layer or the picture as it appears on the screen (the combination of layers).
    • Selection Method - Defines the method of selection. Normal is the traditional selection of Magic Wand. In this method, the selection will be performed from the initial point outward. All Pixels - In this method, the entire picture/layer will be scanned (depending on the Select Area By value) and all the areas on the picture/layer with the same hue will be scanned as well.
How to use the tool

In order to (actively) select the area on the picture, use the mouse to point on the spot where you wish the selection to begin (the spot on which the Magic Wand's selection will be based on). To perform the selection, you must left-click with the mouse on this spot.

Basic Area Select

When you wish to perform operations only on certain areas of a picture (on the active layer), you must select the desired area before performing the operation. After selecting the area, you may work on it (change it, paint on it, perform effects on it and so on) without affecting the rest of the picture (the rest of the active layer).
In order to select an area on the picture, you must decide what type of area you wish to select and according to that use one of the three selection tools to perform the desired selection:
  1. To select a geometrically shaped defined area (such as a square, rectangle, circle or ellipsis and so on) use the Standard (Geometric) Selection Tool.
  2. To select a polygonal shaped area and/or a free-shaped area (when you wish to draw the selection line using the mouse), use the Custom Selection Tool.
  3. To select an image from a background (or the background itself), use one of the following tools:
    • If the background has a single hue, use the Magic Wand.
    • If the background does not have a single hue, use the Custom Selection Tool using the Magic Selection element.


Advanced Selection Issues

After selecting a certain area, you may continue to select other areas on the picture combining the use of any of the three selection tools. It is possible to combine the use of selections to create unique selections, move selections, move the content of the selections, duplicate selections and more (for example, in order to select a donut/ring shaped area, you must combine the use of two circular selections. You will find more explanation ahead).

Advanced Selection Options

In case after having created the selection, the resulting selection seems "sharp" or "jagged" (at its edges), perform the selection once again using the Smooth (Antialias) option. If you wish to create a gradual transition between the selection area and the rest of the picture (for example, if you want a certain area on a color picture to have grey hues (the Grayscale function) but you want the transition to be gradual and smooth and not "sharp", perform the selection using Feather with a value greater than 0 and only afterwards activate the Grayscale function).

Advanced Selections Techniques

In order to select complex areas on a picture, you must use the Advanced Selections Techniques of adding and subtracting (leaving out) selections. When there is a selection on the picture and you wish to add to the selection (i.e. select other areas on the picture and/or increase the selection), press the Shift button and perform the selection you wish to add (using any one of the three selection tools). In order to subtract (leave out) from a selection, press the Ctrl key and perform the selection you wish to subtract (leave out) using one of following two selection tools: Standard Selection or Custom Selection (this option is not available for Magic Wand). Example: to select a donut/ring shaped area you must first select the circumference of the exterior ring (circle selection) and afterwards subtract from it (leave out) the inner circumference (selecting an inner circle which is smaller while pressing the Ctrl key).

Moving the Selection Lines

(This option is available only when one of the three selection tools is active. Before moving the selection, make sure you have selected one of the three selection tools) After you have performed a selection and you wish to move it (move the selection lines), point on it with the mouse and, pressing the mouse's right button move it to the desired spot.

Moving the Selection's Content

(This option is available only when one of the three selection tools is active. Before moving the selection, make sure you have selected one of the three selection tools) In order to move the selection's content, point on it with the mouse, press on the left button and drag the selection (to drag the selection without affecting the original layer press and hold down the Alt key while performing the dragging operation). Dragging the content of the selection will, in effect, drag what is inside the selection lines on the active layer. In order to drag the selection's content from another layer, you must first make it the active layer (selecting it from the Layers list) and afterwards perform the dragging operation. The dragging operation will create a "floating" selection above the layer from which it was created. This way, you will be able to see it in the Layers Window in the Layers list under the caption, Float Selection. In order to change the Float Selection's place in the hierarchy of layers, you must select it from the Layers Window (make it the active layer) and use the Move Top, Bottom, Down and Up buttons in the Layers Window's toolbar. In addition, you may change the opacity of the Float Selection using the Opacity regulator located next to it in the Layers Window.

Finishing Work with a Selection

In order to cancel a selection after having finished working on it, use the Select None function.


Selections Menu

This menu contains many functions related to selection and selected areas through which it is possible to cancel a selection, change a selection, customize a selection and more.
Select All

A function used to select the entire image. The function is especially useful when you want to drag the entire image.


Select None

A function used to cancel an existing selection on the image, in case a selection was made. After you have finished working with the selection and you wish to go back and work on the entire image (return to the original state), you must activate the Select All function.


Invert

A function which operates an "inversion" to the selection. After the inversion operation, areas which were without the selection will become the selection area and the area which was within the selection area will become un-selected, i.e. without the new selection. The function is very useful when it is difficult to select the image, but easy to select the background (for example, when the background has only one hue). In cases such as these, you must first select the background (with the Magic Stick) and afterwards activate the inversion operation that will, in effect, select the image.


Hide Selection Marks

Pressing this sub-menu will hide the selection marks (the selection lines- i.e. the Marquee). Pressing the sub-menu again will make them reappear. The default is when selection marks are displayed (in most cases you will want to see the marks/lines). The hiding option is useful when you wish to hide the line marks, but not to cancel them (in order to see what the result looks like without the selection marks).

Hiding the selection marks does not cancel the selection. In addition, when you make a new selection operation while the selection marks are hidden, you will not be able to see the marks but you will still be able to normally perform all the desired operations on it.


Create Selection From Mask

A function used to create a selection using the layer's mask. The function is operational only if the layer which is being working on has a mask. In order to create a selection from a mask, you must first activate the desired layer (select it from the Layers window) and afterwards activate the function.


Create Mask From Selection

This sub-menu contains two functions which enable you to create a mask (for a layer) using the selection. In order to create a mask for a layer, you must first activate the layer (select it from the Layers window) and afterwards activate one of the two options. If the active layer has a mask, it will be replaced.
  • Show Selection - will create a mask in which the parts on the layer in the area of selection will be visible and the parts which are without will be hidden (transparent).
  • Hide Selection - will create a mask in which the parts on the layer in the area of selection will be hidden (transparent) and the areas without will be visible.


PhotoPos.com Home Page | Help Home | 1999 - 2013 (c) Copyright Power Of Software. All rights reserved