Photo Pos Pro free photo editor - Online Help

Custom Search
- User's Guide
- Welcome
- Quick Start
- Selections
- Printing, Scanning And Importing Images
- Advanced Image Editing
- Colors And Brightness
- Auto Corrections
- Brightness/Contrast
- RGB (Red/Green/Blue)
- RGB Absolute (Red/Green/Blue)
- HSL (Hue/Saturation/Luminosity)
- HSV (Hue/Saturation/Value)
- Logarithm Stretch
- Exponential Stretch
- Gamma Correction
- GrayScale
- Negative
- Split To RGB
- Combine From RGB
- Color Depth
- Image Background Color
- Curves
- Replace
- Histogram (Stretch, View, Equalize)
- Size, Orientation And Resolution
- Filters
- Advanced Picture Corrections
- Editing Tools
- Colors And Brightness
- Drawing And Painting
- Text Tools
- Effects
- Layers And Masks
- Vecotorial Objects
- Textures, Patterns And Gradients
- Scripts and Batch Operations
- Picture Browser
- Expanding Photo Pos Pro's Capabilities
- Program's Interface
- Overview
- Menus
- Toolbars
- Program's Tools
- Pointer Tool
- Magnifying Tool (Zoom)
- Standard (Geometric) Selection Tool
- Custom Selection Tool
- Magic Wand (Selection) Tool
- Color Sampler Tool
- Paint Brush Tool
- Custom Paint Brush Tool
- Clone Brush Tool
- Super Magic Brush Tool
- Line Tool
- Shape Tool
- Flood Fill Tool
- Text Tool (Regular)
- Text Over Path Tool
- Refiner Tool
- Eraser Tool
- Custom Eraser Tool
- Tutorials
- Add a frame to your photo
- Creating a Beautiful Photo Collage
- Isolate a certain part in the image (Crop)
- Removing an unwanted object (Clone Brush)
- Removing "Red Eye" from a picture
- Creating a Greeting Card
- Take out/in Someone From a Photo (Or Replacing an Image Background)
- Creating a Button
- Creating Outlined Text Effects
- Creating 3D Text Effects
- Creating a GIF image with transparent background
- Create a Film Artwork Design
- Create a Flame Effect
- Create a Lava Star effect
- Batch Conversion (File Format)
- Batch Resize (Pictures)
- Turn Your Design into HTML Web Page
- Fun with photos (Replace someone's body)
- Creating a Neon Sign
- Creating Magical Effects
- Inner Glow Effect
- Creating Chrome Effects
- Using Templates to Create Stunning Designs
- Building HTML Web Pages
- Adding water mark to picture (video turotial)
- Whiten teeth (video turotial)
- Adding a Tattoo to Person (Video Tutorial)
- Creating a Glass/Crystal Ball/Orb (Video Tutorial)
- How To Change Eye Color Using Photo Pos Pro (Video Tutorial)
- More...
- How to... (Quick guide for common tasks)
|

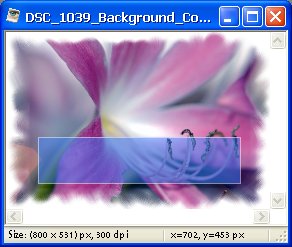
 icon on the Shortcuts toolbar or Click on File -> Browse Theme Backgrounds� menu). Select the Flowers tab. Select the DSC_1039.jpg background and press Load Background. A new copy of the background will be exported to the editor. (Figure no. 2).


